Now that you planted,watered and nurtured,your garden all summer long,it is time to harvest all that goodness! How can you possibly eat all of them before they spoil though? Not to worry,that is what preserving/canning was invented for!
And you can too!
I have been canning/preserving for at least 15 years now,the first time was not only exciting,but also a little scary. However,there are so many resources at the tips of your fingers,you could be a pro in no time.
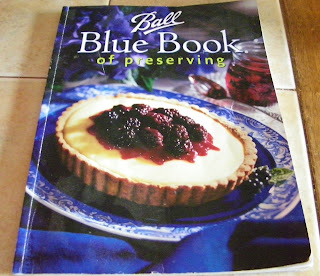
When deciding to give preserving a go,this is the book that helped me to have a successful first attempt! Not to mention many,many more there after,and it is still my go to book. I would highly recommend it for the person just starting out,and the seasoned home canner alike.
There are two methods for canning ~ Water Bath & Pressure Canners ~ Both methods heat the food,thus killing any microorganisms that might grow,as well as creating a vacuum seal in the jar. This prevents any air contact with the preserved food,as well as cell growth which would cause the food to spoil.
~ Basic Supplies/Utensils Needed to get started water bath canning ~
- 21 quart capacity water bath canning pot with canning jar rack
- Jars,Ball or Mason brand
- Lid wand (for tightening hot lids)
- Wide mouth canning funnel
- Jar lifter (for lifting jars out of the canner)
- Bubble remover (you could use a butter knife for this)
- Ladle (for filling jars)
- clean cloth (for cleaning the jar rims)
The first step in canning is to sterilize your jars,to do this,wash them in very hot soapy water. Then place them in a boiling water bath for ten minutes,after which time you can remove the jars. Update,please click the link below to read about some NEW Changes in PROCESSING...
NEW CHANGES In Canning Lid Procedures
When canning make sure to use only wooden,glass,or plastic. Iron,Aluminum,and Copper can discolor your produce.
~ Prepare your produce ~
For the best results,use only fresh ripe produce,the longer it sits,the less vitamins,and nutrients remain. Wash,peel,core,slice,dice. Lemon juice,or Fruit Fresh can be used to keep fruit from discoloring.
~ Filling Jars ~
When filling your jars,remember to only fill to the specified amount of head space listed in your recipe.
Each ridge on the jar represents an amount of headspace (see above photo). Produce expands during the canning/boiling process,so it is Important to leave adequate headspace. Once jars are filled,use the bubble remover to remove any air bubbles from the jars. Lastly,before placing lids and rims on jars,wipe down the rim and sides of the rim with a clean damp cloth. This will remove any spilled/dripped food or liquid,and help assure a good seal.
~ Processing Jars ~
It is best to preheat the water in the water bath canner,for hot produce,the temperature should be 180 degrees F. For cold produce the water temperature should be 140 degrees F. After all jars are placed in the canner,the water level should be 1-2 inches above the tops of the jars. If using a pressure canner,refer to the manufacturers directions. Mine came with a small booklet on how to use it,and also had recipes.
Carefully add jars with your jar lifter,making sure that they do not touch each other,so that there is adequate water flow around them. Place the lid on the canner and bring water to a boil,before starting the timer. Each recipe will list the amount of time required. Make Sure that you Check to see the amount of time listed for Your Altitude,as times vary depending on what altitude you are at.
~ Removing your Jars ~
After the boiling time has elapsed,carefully remove the jars from the canner,using the jar lifter. Place them on a kitchen towel in a draft free place. As the jars start to cool,you will hear them pop,as they seal. When they are completely cool,you can push in the center of the lids with a finger,to check the seal. If if pops back it is Not sealed. To be certain my jars have sealed,I remove the rings,and gently tug on the lid,if it holds I know it has properly sealed.
If any of your jars did not seal (this has happened to me a few times) just place the un-sealed jar in the refrigerator and use within the next few days.
~ Labeling and Storing ~
Some jars come with little sticky labels that you can write on,some do not. You can do a google search and find free labels to download and use also. Or,you can make up your own. Store in a cool,dry,dark place.
Next week we will can something!


Cool, a good time to start this topic. I love to can spiced peaches for me, and beets for my hubby, applesauce too. Yum!
ReplyDeleteI like where this is going...
ReplyDeleteIf you pre-wash/sterilize jars, can they be stored upside down on a clean towel until use, for a day or so?
Great post! This is my goal for next year.
ReplyDeleteGreat post, that's the same book I started with. I love the two page process pages with the drawings. They really inspired confidence when I first started out.
ReplyDeleteWhat did you respond to bookworm 22? I am under the impression that you really should sterilize the jars for 10 minutes in the water bath immediately before filling them, both so they are sterile and also so they are warm and ready for the intense heat. But I've seen YouTube videos where people sterilize their jars in the dishwasher sterilize cycle. I have done that before, but I don't think it really sterilizes them and since I'm feeding my kids, I just went back to 10 minutes at a boil. What do you think.