Showing posts with label preserving. Show all posts

Wednesday, August 13, 2014

Let the Preserving begin...

Last year I did a series on preserving,if you are new around here,or to home canning/preserving take a few minutes to check out this post on preserving,it is a preserving 101.


This year the summer squash has been producing like crazy,which is a very good thing!  But,what do you do with all that zucchini?  Of course there is always the favorite around here,zucchini bread,or zucchini muffins,but today we will be making something else entirely.

Zucchini Relish:

Ingredients needed...

  • 2 cups chopped zucchini (about 3 medium size)
  • 1 cup chopped onion (about 1 medium)
  • 1 cup chopped bell pepper (I like color so am using three different peppers)
  • 2 Tablespoons salt (I am using canning,but regular table salt will work)
  • 1 3/4 cups sugar
  • 2 teaspoons celery seed
  • 1 teaspoon mustard seed
  • 1 cup cider vinegar


Combine zucchini,onion,and bell peppers;sprinkle with salt;


cover with cold water.  Let stand 2 hours.  Drain;rinse and drain again thoroughly.  Combine,remaining ingredients in a large pot.  Bring to a boil.  Add vegetables;simmer for 10 minutes.  Pack hot relish into hot,sterilized jars,leaving 1/4 inch head space.  Remove air bubbles.  Adjust lids and rings,and place on jars.  Process in a water bath canner at recommended time for your altitude.  (sorry,not photos of the last steps,but the above link covers that)


This recipe yields about 4 half pints.  The jar on the bottom left in this photo is a half pint,the other four are pints.  I have made several batches already,and just used larger jars.  If I had used half pints there would be nine pictured.  Of course we have already been enjoying some...


of our homemade relish!


Wednesday, October 9, 2013

Carrot Cake Preserves

This week there was not time to make my recipe in advance,which means,there are no step by step photos.  Sorry about that,if you are new to canning,you can go here for the basics of canning,or if you  just need a little refresher.                                                                                                                                            Are you ready for another canning recipe?  I have a real treat in store for you today!

 Carrot Cake Preserves with cream cheese on toasted homemade bread.

Utensils:

  • 7 half pint canning jars(Mason,Kerr,Ball,your choice)
  • basic canning equipment 
  • large stockpot


Ingredients needed for this recipe:


  • 2 cups finely shredded carrots (4 medium sized)
  • 1 15-ounce can crushed pineapple (packed in juice,undrained)
  • 1 medium sized pear of your choice (peeled & chopped)
  • 2 Tablespoons lemon juice
  • 1 teaspoon ground cinnamon
  • 1/2 teaspoon ground nutmeg
  • 1 1.75-ounce package regular powdered fruit pectin
  • 4 cups granulated sugar
  • 2 cups packed brown sugar
  • 1/4 cup coconut flakes or raisins,or both (optional)
  • 1 teaspoon vanilla extract
Method:

In a 6-8 quart stockpot combine carrots,pineapple,pear,lemon juice,cinnamon,and nutmeg.  Bring to a boil stirring constantly;reduce heat.  Simmer,covered for 20 minutes,stirring frequently.  When 20 minutes has elapsed,remove from heat.  Sprinkle powdered pectin over mixture;stir until it has dissolved completely.

Return to heat,and bring mixture to boiling,stirring constantly.  Add granulated and brown sugars.  Return to a full rolling boil,stirring constantly.  Boil hard for 1 minute,again stirring constantly.  Remove from heat.  Quickly skim off any foam with a metal spoon.  Stir in the coconut and or raisins(if using) and vanilla extract.

Ladle hot preserves into hot sterilized half pint jars,leaving 1/4 inch headspace.  Wipe jar rims,adjust lids and rings.

Process jars in a water bath canner for 10 minutes (remember to check the time for your altitude,it was 25 minutes for mine).  Start the timer when water has returned to a full rolling boil.  After processing time has elapsed,remove jars from canner;place in a draft free place to cool.


*Makes 7 half pints*

~ TIP ~  Finely chopped fruit stays suspended better than coarsely chopped fruit.  A sweet way to keep the fruit evenly distributed is,to turn the jars about every half hour for a couple hours. (this is not a necessity,so you can skip it if you want)

EnJoy!

Be sure to check out my current Giveaway for a chance to win one of three patterns!!!


Wednesday, October 2, 2013

Ginger ~ Brown Sugar Sweet Potato Butter

Do you like Sweet Potatoes,if you answered yes,then today's preserving recipe is for you!


Looks and tastes like a mouthful of fall!  I can see this on my ThanksGiving table with some oven melted/browned marshmallows on top Mmmm...

Ginger ~ Brown Sugar Sweet Potato Butter:


Ingredients:

  • 3 1/2 to 4 pounds of orange-flesh sweet potatoes
  • 1 1/2 cups golden brown sugar (packed)
  • 2/3 cup apple juice (I chose to use apple cider instead)
  • 1/4 cup lemon juice
  • 1 tablespoon grated fresh ginger
  • 1/4 teaspoon salt
  • 1/4 teaspoon nutmeg (you can use ground or grate your own like I did)
Preheat your oven to 425 degrees.  Wash your sweet potatoes thoroughly with a vegetable brush;pat dry.  Prick sweet potatoes with a fork.  Bake for 40 to 60 minutes or until tender;cool slightly.


In order to save time and have light to take good photos,I baked my sweet potatoes the evening before. So I was able to easily skin/peel them.  Since yours will be quite hot,cut them in half lengthwise,scoop out the pulp with a spoon and discard the skins.


Transfer the pulp to your food processor.  Cover and process until very smooth,scraping the sides of the bowl occasionally.  ~ Tip ~  If you are having a hard time getting the sweet potato pulp to process to a smooth consistency,add some of your apple juice to help get it going.


The pulp will be very thick and smooth after processing,use a spatula to transfer to a stock pot.


Here the recipe says to only transfer 4 cups of the pulp to the stock pot,and set the rest aside for another use,I ignored that and transferred all of the pulp(since this is a freezer recipe and not a actual canning recipe).  Which gave me one more container at the end.  You can do whichever you like.

Add your,brown sugar,apple juice (or the remaining juice if you used some in the previous step),lemon juice,ginger,salt,and nutmeg to the sweet potato puree.  Using a plastic or wooden utensil stir to incorporate all the ingredients.


Bring to boiling;reduce heat.  Simmer,uncovered,for 30 minutes stirring frequently.  If it spatters,reduce heat further.  I did not have a problem with spattering,but found it necessary to stir Very Frequently to keep it from sticking.  So make sure you can give this your Full attention during the 30 minute cooking time.


Spoon into your containers,mine are ziploc 8oz freezer containers.  You can use any freezer containers,including mason jars.  If you follow the recipe and use only 4 cups of puree you should only have 5 containers.  If you followed my example and used all of the puree you should have 6 containers.   Remember to leave 1/2 inch headspace for expansion.  Let cool completely before placing the lids on containers and freezing.

Store in the refrigerator for up to one week or freeze for up to 6 months.  Enjoy!  

Sorry for all the excess space at the bottom of this post,I have no clue how it happened or how to fix it.


Wednesday, September 25, 2013

How to Pickle Beets

Do you like pickled beets,well if you do then todays preserving/canning recipe is right up your alley!  Because today we will be pickling beets.

When Choosing beets,look for ones that are firm to the touch with smooth skins and crisp,fresh looking greens.


What you will need for this recipe:


  • 3 pounds of whole beets (around 2 inches in diameter)
  • 2 cups vinegar
  • 1 cup water
  • 1/2 cup sugar
  • 3 inches of stick cinnamon
  • 1 teaspoon whole allspice
  • 6 whole cloves 
  • small piece of kitchen string
  • 6 inch square of cheesecloth (doubled)
  • 6  half pint canning jars,lids,rings
  • canning/preserving utensils
  • stockpot
  • saucepan


Wash your beets and cut off the stems (you can leave about an inch of the stem,I chose not to) and the root end.  Do Not peel.  In a stockpot cook beets in enough boiling,lightly salted water to cover,for about 25 minutes or until tender;drain.  Cool beets slightly;trim off stems.


Slip off and discard the skins.


  In a medium saucepan,combine vinegar,water,and sugar.  For your spice bag,place cinnamon,allspice,and cloves in the center of the cheesecloth.  Bring up the corners;tie closed with the kitchen string,and add to the saucepan.  Bring to boiling,stirring to dissolve sugar;reduce heat.  Simmer uncovered for 5 minutes.  Remove from heat and discard spice bag.


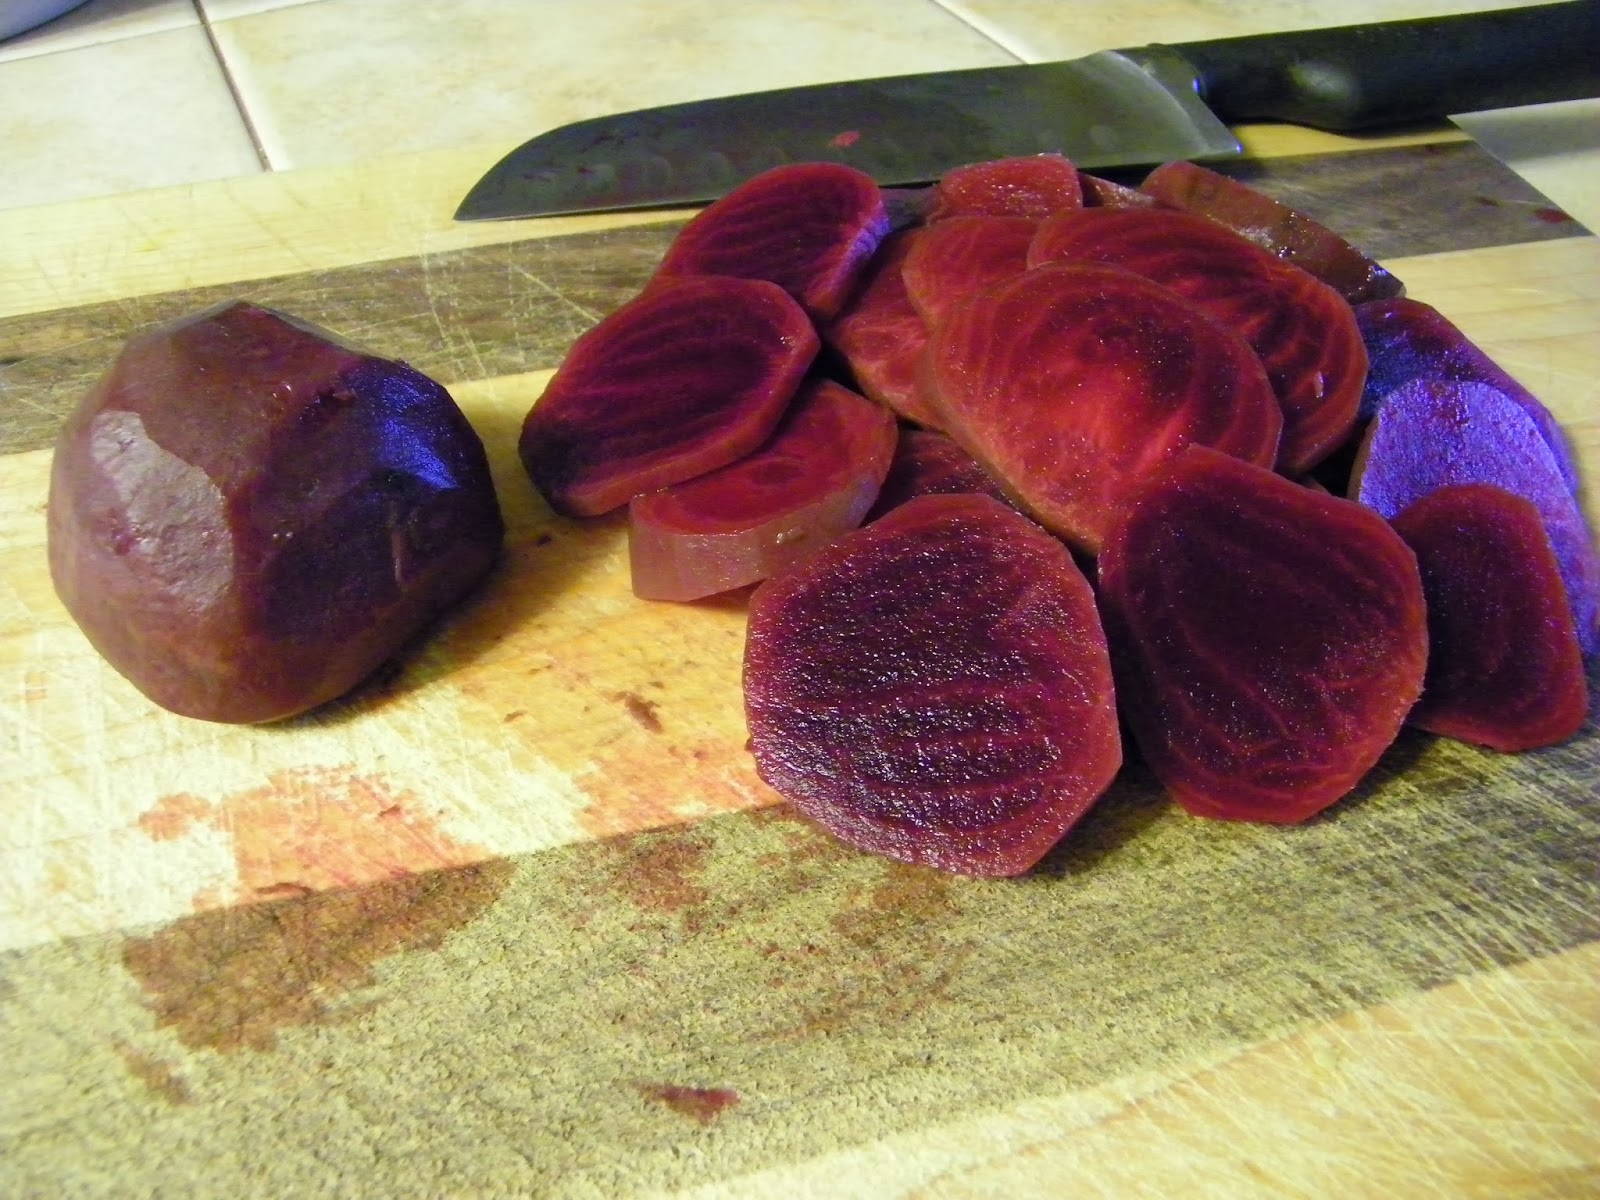
While the liquid simmers,prepare the beets for the jars.  Here you can either quarter or slice your beets.  I have chosen to slice mine,in 1/4 inch widths.


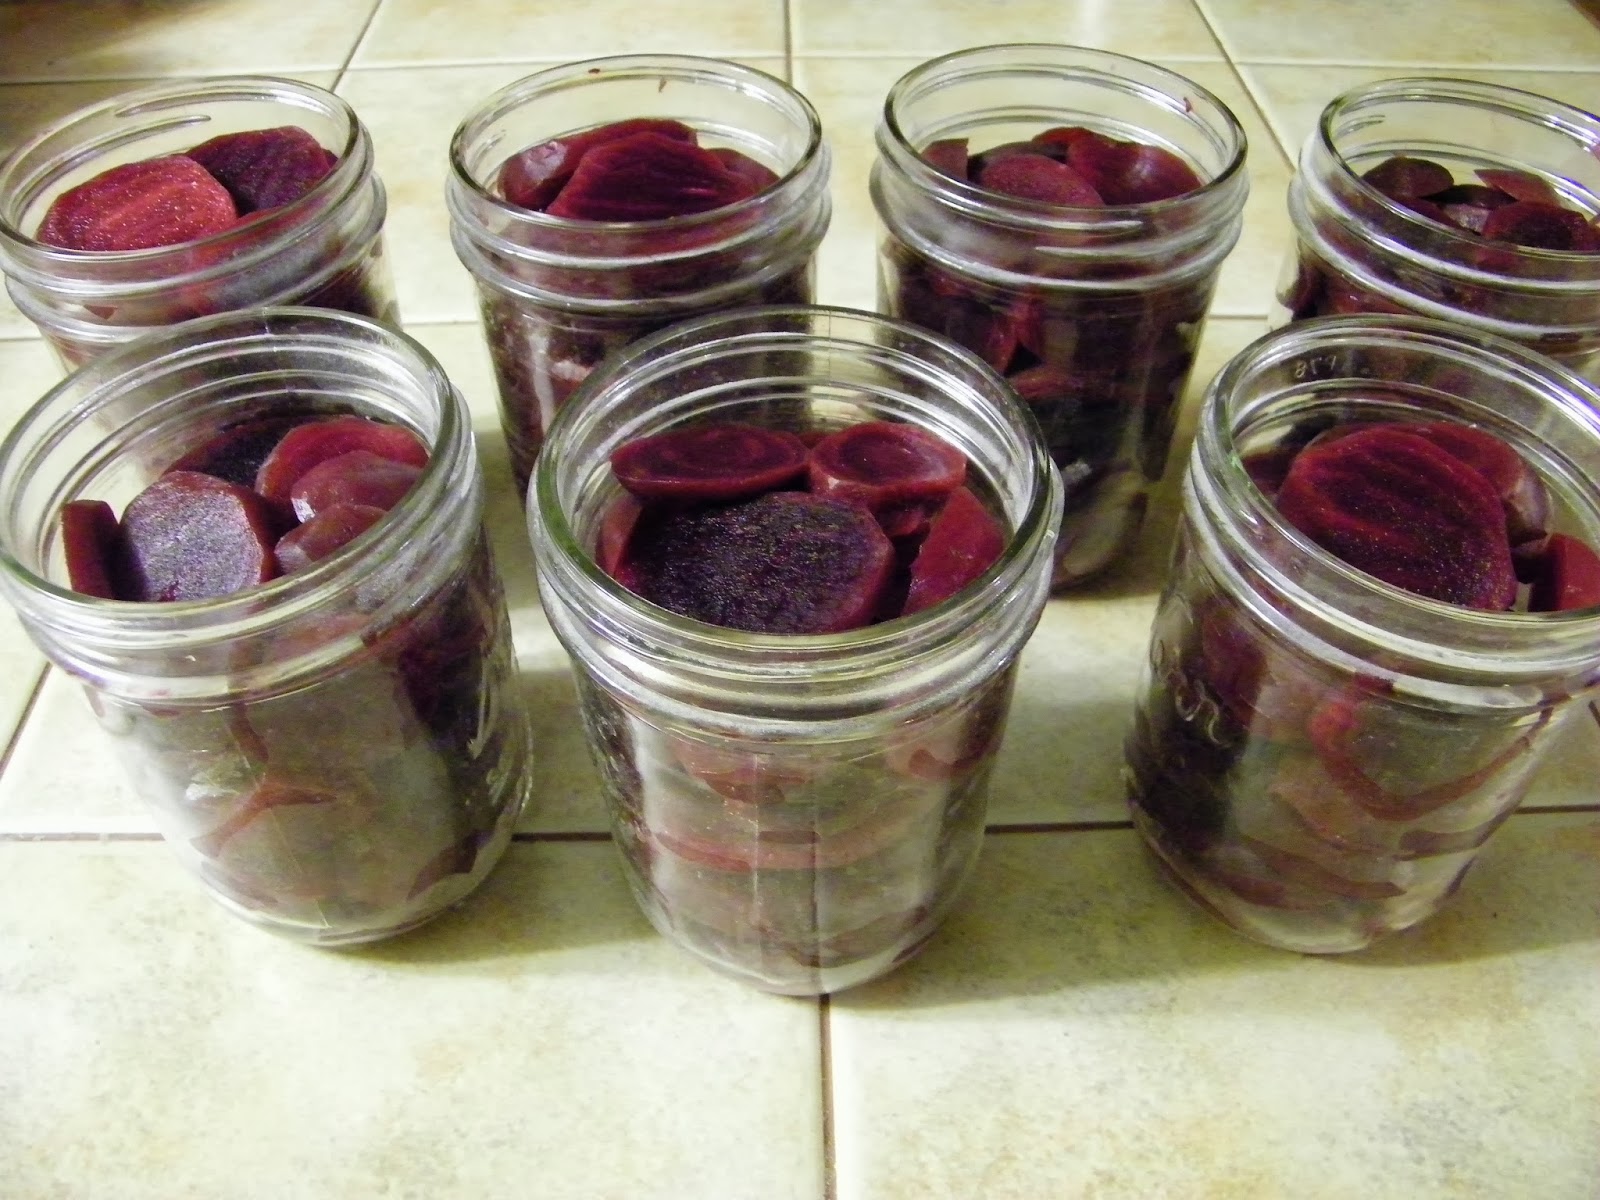
Pack your beets into your hot sterilized jars leaving 1/2 inch headspace.  Never mind that I actually have 7 pint size jars here.  I had a lot more beets to can,so adjusted the recipe accordingly.


Pour the hot vinegar mixture over beets,maintaining the 1/2 inch headspace.


Use your bubble remover to remove any air bubbles from the jars,wipe the rims,adjust lids,and screw on the rings.


Place your jars into the water bath canner and bring to a boil.  When water comes to a boil,process for the recommended time for your altitude.  (refer to the Ball Blue Book of Canning,or you could google it)


When the processing time has elapsed,remove the jars to a draft free place to cool.  Remember to check the seals on each jar.  For the best taste wait for at least 24 hours before trying your beets.  Enjoy!


Wednesday, September 18, 2013

Pina Colada Freezer Jam

Are you ready to can/preserve some more veggies from the garden?  Today we are going to be making some jam reminiscent of a cocktail drink called Pina Colada!  You are going to be surprised by one of the ingredients,but don't let that make you shy away from trying out this recipe.  I assure you,that this jam is so good you could eat it right out of the container with a spoon!  (at least,Mr. P did!)

Pina Colada Jam:


Supplies from the cupboard/pantry needed to make this recipe.


  • Large stock pot
  • Mason jars (or plastic freezer containers) 8 oz
  • wooden or plastic spoon 
  • ladle
  • grater or food processor 
  • clean cloth (for wiping the rims of the containers)
  • 2 three ounce packages of Pineapple gelatin
  • 1 teaspoon of Rum extract
  • 1/4 cup lime juice
  • 1 20 oz can of crushed pineapple (do not discard the juice)
  • 6 cups grated Zucchini (use a grater or food processor)
  • 6 cups sugar


Add to your stock pot,the grated zucchini,lime juice,sugar,pineapple including the juice.  Stir to incorporate/mix all of the ingredients together.


Bring to a boil.  Stirring constantly,boil for 10 minutes.


Remove from the heat (I just turned off the gas burner).  Add the 1 teaspoon of rum extract,and stir to incorporate.


Add the two packages of pineapple gelatin,and stir until it has all dissolved.  Allow to cool slightly,especially if you will be using plastic freezer containers.


These are the containers I will be using for my jam,because they stack nicely in the freezer.


Move your stock pot to a location with plenty of room to work.  The kitchen table works great for me.


Now we are ready to start filling the containers.  Make sure that you leave a 1/2 inch headspace at the top of your containers.


After filling all the containers,set them aside to completely cool before placing the lids on them.


Once the jam is cooled off wipe the rims of your containers with the(damp) clean cloth before placeing the lids on your containers,label them and place them in the freezer.  I left one container out at Mr. P's request :)

The jam wil keep for up to one month in the refrigerator,or up to one year in the freezer.  Hope you give this one a try,you will be surprised at how unexpectedly delicious it is!


Wednesday, September 11, 2013

How to can/preserve Spaghetti Sauce

Lets get right to it shall we?


If you have the Ball Blue book of canning,check out the step by step for canning Tomatoes pages,they will walk you through how to process tomatoes.

Spaghetti Sauce:


  • 10 pounds tomatoes
  • 1 zucchini squash
  • 1 yellow squash
  • one large sweet onion
  • 8 cloves garlic
  • 4 medium sweet peppers or equivalent 
  • 1 chipotle pepper
  • 1 can tomato paste
  • 1 tablespoon cinnamon basil
  • 1/2 teaspoon smokey paprika
  • 3 tablespoons brown sugar
  • 6 tablespoons lemon juice


First,gather up your tomatoes from,the garden,farmers market,or where ever you are getting them.  Bring them home and give them a good washing.  Most recipes I have ever read tell you to discard the skins and seeds,I do not.  Mostly because I do not like to waste,and also because I think that they add flavor,and vitamins.  (so if you want to discard them,by all means do so)


I like a nice chunky sauce with other veggies included,so add 4 medium sweet peppers or the equivalent,of your choice of peppers.


These are the ones I will be using in my sauce.


Dice up your tomatoes in bite sized pieces and place in a large stock pot.


Do the same with your sweet peppers.


Your one large sweet onion,I used a Walla Walla.


Next peel your garlic,and then mince it up and add it to the pot.


Your zucchini and yellow squash also get diced up and added to the mix.


If you like a little heat,add one or more of your favorite chili peppers.  I used a chipotle pepper,which just gives it a little zip.  (you probably will want to chop or mince it up first)  I also added 1 tablespoon cinnamon basil,1/2 teaspoon smokey paprika,three tablespoons brown sugar,and 6 tablespoons lemon juice.


One can of tomato paste,you could add two if you like a thicker sauce.  Now stir to incorporate all of the ingredients together.  place on the stove over a medium high heat and bring just to a boil.  Reduce the heat and simmer for an hour.


While the sauce simmers,gather your canning utensils together.


Sterilize your jars and lids.  I like to use my canner,that way the water is already hot and does not take that long to heat back up to boiling.


When the sauce has simmered for an hour you are ready to start filling jars.


I find using a saucer helps to keep any spills contained.


Using your ladle,fill each jar to leave a 1/4 inch headspace.


Using your bubble remover,slide it down the sides of the jar to bring the bubbles to the top.  I also do this in the center of the jar a couple of times.


Make sure to use your clean cloth to wipe down the rim and sides (where you will screw on the ring) so that you will have a clean surface,and get a good seal.


Now take the magnetic lid tool and remove one lid and ring from the water bath.


See how the tool is a little off center?  If you go towards the side of the ring,you will get both the ring and the lid,but if you get too close to the center you will only pick up the lid.


Place the lid on the jar and tighten,make sure to use the cloth on the jar so you do not burn your hand on the Hot jar.


Oops,not enough left to fill the jar!  If this happens,just place the jar in the refrigerator and use within a couple of days.


Time to put all the jars into the canner!  If you place the first jar in the center it will be much easier,as the rack will not tip to one side.


Place the next jars opposite of each other until you have placed all 7 jars in the canner.  Carefully unhook the rack from the sides of the canner and lower into the water bath.


Almost ready to put the lid on so the water will come to a boil.


Before placing the lid on add three tablespoons of plane white vinegar to the pot.  This will help to keep the jars from getting a white film on them while processing.  Be sure to check the altitude chart for the correct time to process.  The recipe I loosely followed said 35 minutes,but at my altitude the time was 50 minutes.  So check!


When the correct processing time has elapsed,use your jar lifter to remove the jars.  It is a little easier if you hook the rack onto the sides and then remove the jars.  However Mr. P removed them for me this time,and he didn't bother with the rack.


Place the jars in a draft free place to cool.  Making sure to check the seal(remember I also tug gently on the lids to make certain they have sealed) by pressing down in the center of the lid to make sure it does not pop back and forth.