Showing posts with label tutorials. Show all posts

Saturday, July 5, 2014

Banish the fear of Zippers

If you have a fear of Zippers or just have not yet had the chance to sew something that requires a zipper,then this is a project to cut your teeth on!


Last week while sewing up all these sweet little vinyl pouches I took photos along the way,just in case any of you would like to make some of your own.

So here we go...


Supplies needed:

Normally I use Heat-N-Bond vinyl for this type of project however,my local Joann's does not carry that brand anymore.  So I purchased this brand instead.

1 Piece of vinyl fuse (any brand) 7 1/2" x 5"
1 scrap of fabric 7 1/2" x 5"
1 7" or longer zipper (if you have experience with zippers you can use a six inch,but it will be a tight fit)

scissors
pinking shears
pins
bone folder (if you have one) I just finger pressed instead
zipper foot
iron
chopstick

This is my scrap of fabric,zipper and vinyl piece.

The first thing we will be doing is attaching the vinyl to our piece of scrap fabric.  I always start in one corner of the piece of paper backed vinyl and peel back the vinyl away from the paper.

After peeling the vinyl off of the paper carefully position it tacky/sticky side down,on the right side of your fabric.

Next place the glossy or slick side of the paper backing on the right side of your fabric.  On top of the vinyl.

 Note*in the photo above the paper with the grid is the Heat-N-Bond brand paper backing,while the plain one at the top is the Pellon brand) The nice thing about the grid on the back of the paper is that it makes it easy to know which side to place down.  Also it is very easy to measure and then cut on the lines as well.

 The next step is to fuse the vinyl to the fabric.  To do this place your iron onto the paper and press,holding the iron in each spot for 8 seconds,just like you are fusing an interfacing.
Turn your fabric over and press on the wrong side for 4 seconds.

Now we are ready start attaching the zipper to the fabric.  Lay your zipper right side up on your work surface,then lay your fabric wrong side up on top of the zipper. Making sure to center the fabric between the zipper ends.  (Mine is very close because I used a 6 inch zipper) Pin the fabric to the zipper to keep it in place.

Take your zipper foot and attach it to your machine.  Mine looks like this,different brands all look a bit different but yours should look similar to this.

Using a 1/4 inch seam sew the zipper to the fabric.  This is really very easy if you have a longer zipper,because there will be plenty of space between the ends and you will not have to try and maneuver around the zipper pull.

Lay your fabric with zipper attached back down on your work surface,with fabric right side down.

Flip the fabric down so it is now right side up.  Use your bone folder,or fingers to press along the top edge of the fabric.  Do Not press with your iron or you will Melt the vinyl!


Take the bottom of the fabric and fold it up even with the top edge of the zipper,pin and sew a 1/4 inch seam just like before.

Unzip the zipper 3/4 of the way and turn right side out.

Sit back and pat yourself on the back,you just inserted a zipper!

 Remove the zipper foot from your machine.  Before replacing with your regular foot you will need to place some tape (I use painters tape,but you can use masking or scotch tape too) on to the bottom of the foot.  This will make the foot glide over the vinyl instead of sticking to it.


Open up your zipper so that you can topstitch along both sides of it.

Topstitch an 1/8 inch from the edge of the zipper on both sides.

Turn wrong side out,and make sure that the zipper is only zipped about a quarter of the way from the end.  Meaning that the zipper is actually 3/4 of the way open.  Here you need to decide where the zipper placement will be on the pouch.  You can leave it centered like this and your zipper will be in the center of the pouch.

Or you can fold the pouch so that the zipper is closer to the top of the pouch.  Totally your choice.

Again using a 1/4 inch seam sew each end of the pouch closed.  Making sure to backstitch at the start and end.  Also make sure to sew back and forth over the zipper several times,so that this part of the seam is strong and will stand up to being zipped open and closed.

Take your pinking shears and cut both ends of the zipper off.

Now turn your pouch right side out.

Take your chopstick and gently push out the corners.

How easy was that?  Not nearly as bad as you thought right!  Enjoy your new little water resistant pouch.

I would love to see yours and hear about your first or one hundred and first zipper sewing experience!


Friday, March 21, 2014

Circle Dish drying mat (a tutorial)

It has been quite a long time since I posted a tutorial,so this afternoon while embellishing a new dish drying mat,I took some photos along the way...


You could use most any dish drying mat,or even a plain ole kitchen towel would work.(I was going to do towels to match,but need to pick up a couple first)  This is the dish mat I like to use,they are a nice compact size 16x18,and are fast drying as well.


I am using my Circle Rulers by Lori Holt for this project,but you could use any round object that you can trace around.  Plates,cups,pill bottle caps...


This is a great scrap buster project,I am using the scraps left from making my Watermelon Twister Bag.


The center circle will be made up of two different fabrics,to do that you will need to sew four squares together like the photo above.  Make sure to use scraps large enough to accommodate your circle.  My center circle is 7" around,so my square needs to be at least an inch larger.


(I know this is actually my 5" circle,so just pretend it is the 7")
What you need to do is to center the circle evenly on the square.  This is where the ruler comes in handy as it has lines and a center dot to help you achieve this.


On the Wrong side of the fabric square center your circle and trace around it with a marking tool,I just used a pencil.


You will need something for the backing,I am re-cycling a used dryer sheet.  You could also use sew-in-interfacing(feather weight) or another lightweight fabric such as muslin.


Place the dryer sheet(or whatever you are using for the backing) on your work surface.  Place the fabric square Right Side Down on top of that.  Pin to hold the two pieces together.


Sew right on top of the traced line that you just drew.  Sew all the way around the traced circle,so that you have a sewn a complete circle.


I should have used a different colored thread so you could see it,sorry.  This is a photo of the stitched circle.


After sewing the circle,I use my pinking shears to trim the circle leaving a 1/4 inch all the way around.


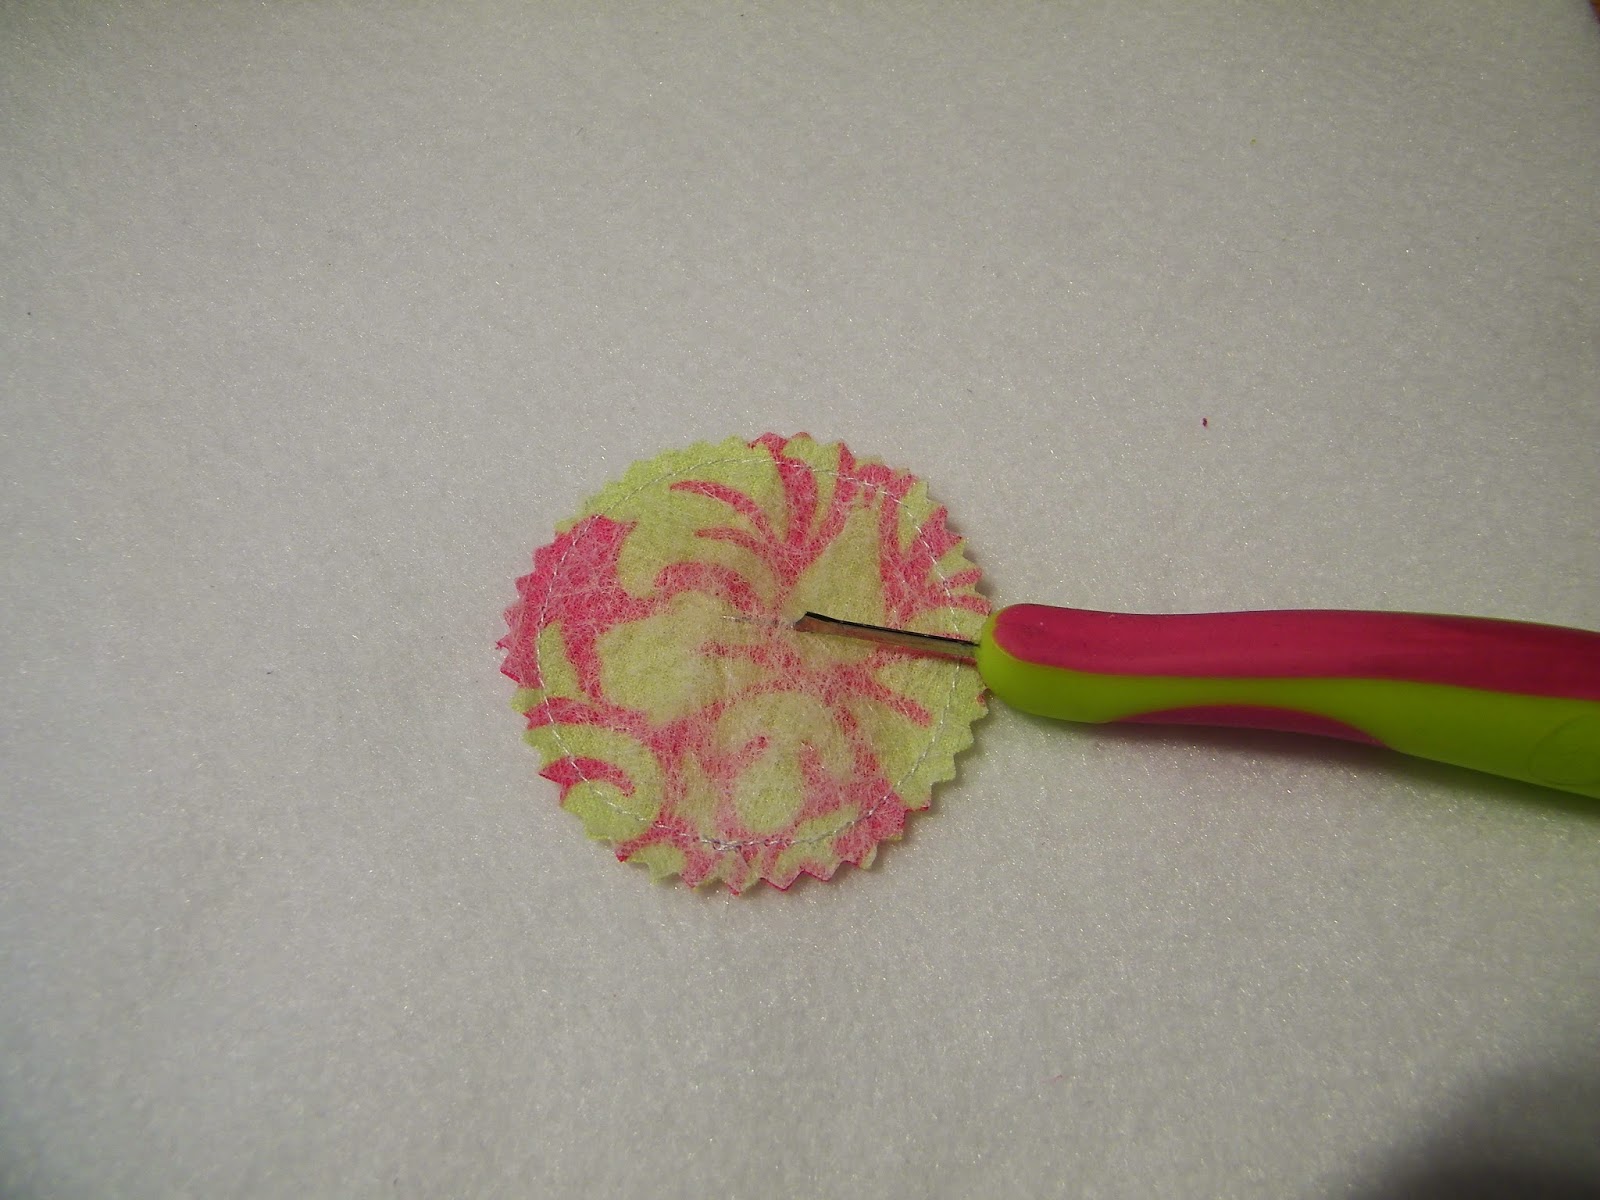
Take your seam ripper and make a short slit in the backing material only,Not the fabric.


Take your scissors and carefully snip an opening for turning your circle.  I like to snip an x large enough to turn the circle right side out,but be careful not to get too close to your stitch line.


Carefully turn your circle right side out.  I run my finger around the inside at the seam to help shape the circle.


Once the circle is turned give it a quick press.  Pretty :)


For my dish mat I will be using one large circle and eight small circles.  Here are six of my eight small circles all stitched to the dryer sheet.  Also all of my smaller circles are a single print.  Make your's however you like.


Pin the circles to the dish mat in a pattern you like.  You can use an applique or other fancy stitch on your machine to attach the circles,or just use a straight stitch.


Now all I need is a few dishes to wash so I can use this sweet new mat!  Hope you enjoy,and make yourself a new dish mat too.


Wednesday, November 21, 2012

Mini Flying Geese Block tutorial

Recently I posted about my baby geese row.  While I was making/sewing my row I took some photos for a tutorial...


These blocks are a great scrap buster!  You will need to different squares,which will give you a total of 4 mini geese blocks.  Your first square needs to measure 3 3/4 inches square ~ your second block needs to measure 3 1/4 inches square.

I hope you do not get confused,as I used a lot of different prints in this tutorial,since I was making my geese.  So if I end up confusing you,I am sorry... but feel free to ask questions if you need to.


We will be marking stitching lines on the larger square (the 3 3/4 inch square).  The smaller square will not need stitching lines.  If you have a 1/2 inch ruler,center it diagonally on the wrong side of the square.  Now mark a line with a pencil or fabric marking pen,on either side of the ruler.

If you do not have a 1/2 inch ruler,use a quilting ruler to mark a line down the center from corner to corner.  Next mark a line 1/4 inch out from the center line.  Do this on both sides of the center line.  So instead of having two lines like I do in the photo above,you will have three lines.


Rotate your block and repeat the above step.  Again if you are not using a 1/2 inch ruler,you will have three lines on the backside of your square.


Now that we have marked our stitching lines,we will be cutting our square into 4 smaller squares.  First we will cut the square exactly in half.  So measure in 1 7/8 from one side and cut the square in half.  Now you will have two rectangles that measure 1 7/8 x 3 3/4 inches.  Note that my smaller square is still untouched.  We will be using it shortly.


Now take your two rectangles and cut them in half,measure in 1 7/8 inches and cut.  Now you should have four (4) 1 7/8 inch squares.


Now,we are ready to use the smaller square.  Take two of the 1 7/8 inch squares and place them right sides together.  Just like in the photo above.  Making sure to line up the stitching lines (they will overlap a little at the center)  Sew on the lines you marked,which are a 1/4 inch away from the center on each side.


This photo shows the stitching and placement of the squares much better.


Cut right down the middle in between your stitching lines.  If you drew three lines then just cut on the center line :)


Press each half towards the two little triangles,just like in the above photo.


Take another one of your 1 7/8 inch squares and place it like this,right sides together on each of your two pieces.  You will again be sewing on the lines you marked previously.


In this photo,you can see my stitching,on the lines I drew earlier.  Now repeat the steps from above.  Cut down the center of the block,or on the center line if you drew one,and press towards the triangle.  You should now have 4 mini/baby geese blocks!


Sew a bunch of these little guys together to make a strip like this.  You can use them in whatever project suits your fancy :)    Hope you were able to follow along,and I didn't confuse you too much!