Showing posts with label Circle rulers. Show all posts

Friday, March 21, 2014

Circle Dish drying mat (a tutorial)

It has been quite a long time since I posted a tutorial,so this afternoon while embellishing a new dish drying mat,I took some photos along the way...


You could use most any dish drying mat,or even a plain ole kitchen towel would work.(I was going to do towels to match,but need to pick up a couple first)  This is the dish mat I like to use,they are a nice compact size 16x18,and are fast drying as well.


I am using my Circle Rulers by Lori Holt for this project,but you could use any round object that you can trace around.  Plates,cups,pill bottle caps...


This is a great scrap buster project,I am using the scraps left from making my Watermelon Twister Bag.


The center circle will be made up of two different fabrics,to do that you will need to sew four squares together like the photo above.  Make sure to use scraps large enough to accommodate your circle.  My center circle is 7" around,so my square needs to be at least an inch larger.


(I know this is actually my 5" circle,so just pretend it is the 7")
What you need to do is to center the circle evenly on the square.  This is where the ruler comes in handy as it has lines and a center dot to help you achieve this.


On the Wrong side of the fabric square center your circle and trace around it with a marking tool,I just used a pencil.


You will need something for the backing,I am re-cycling a used dryer sheet.  You could also use sew-in-interfacing(feather weight) or another lightweight fabric such as muslin.


Place the dryer sheet(or whatever you are using for the backing) on your work surface.  Place the fabric square Right Side Down on top of that.  Pin to hold the two pieces together.


Sew right on top of the traced line that you just drew.  Sew all the way around the traced circle,so that you have a sewn a complete circle.


I should have used a different colored thread so you could see it,sorry.  This is a photo of the stitched circle.


After sewing the circle,I use my pinking shears to trim the circle leaving a 1/4 inch all the way around.
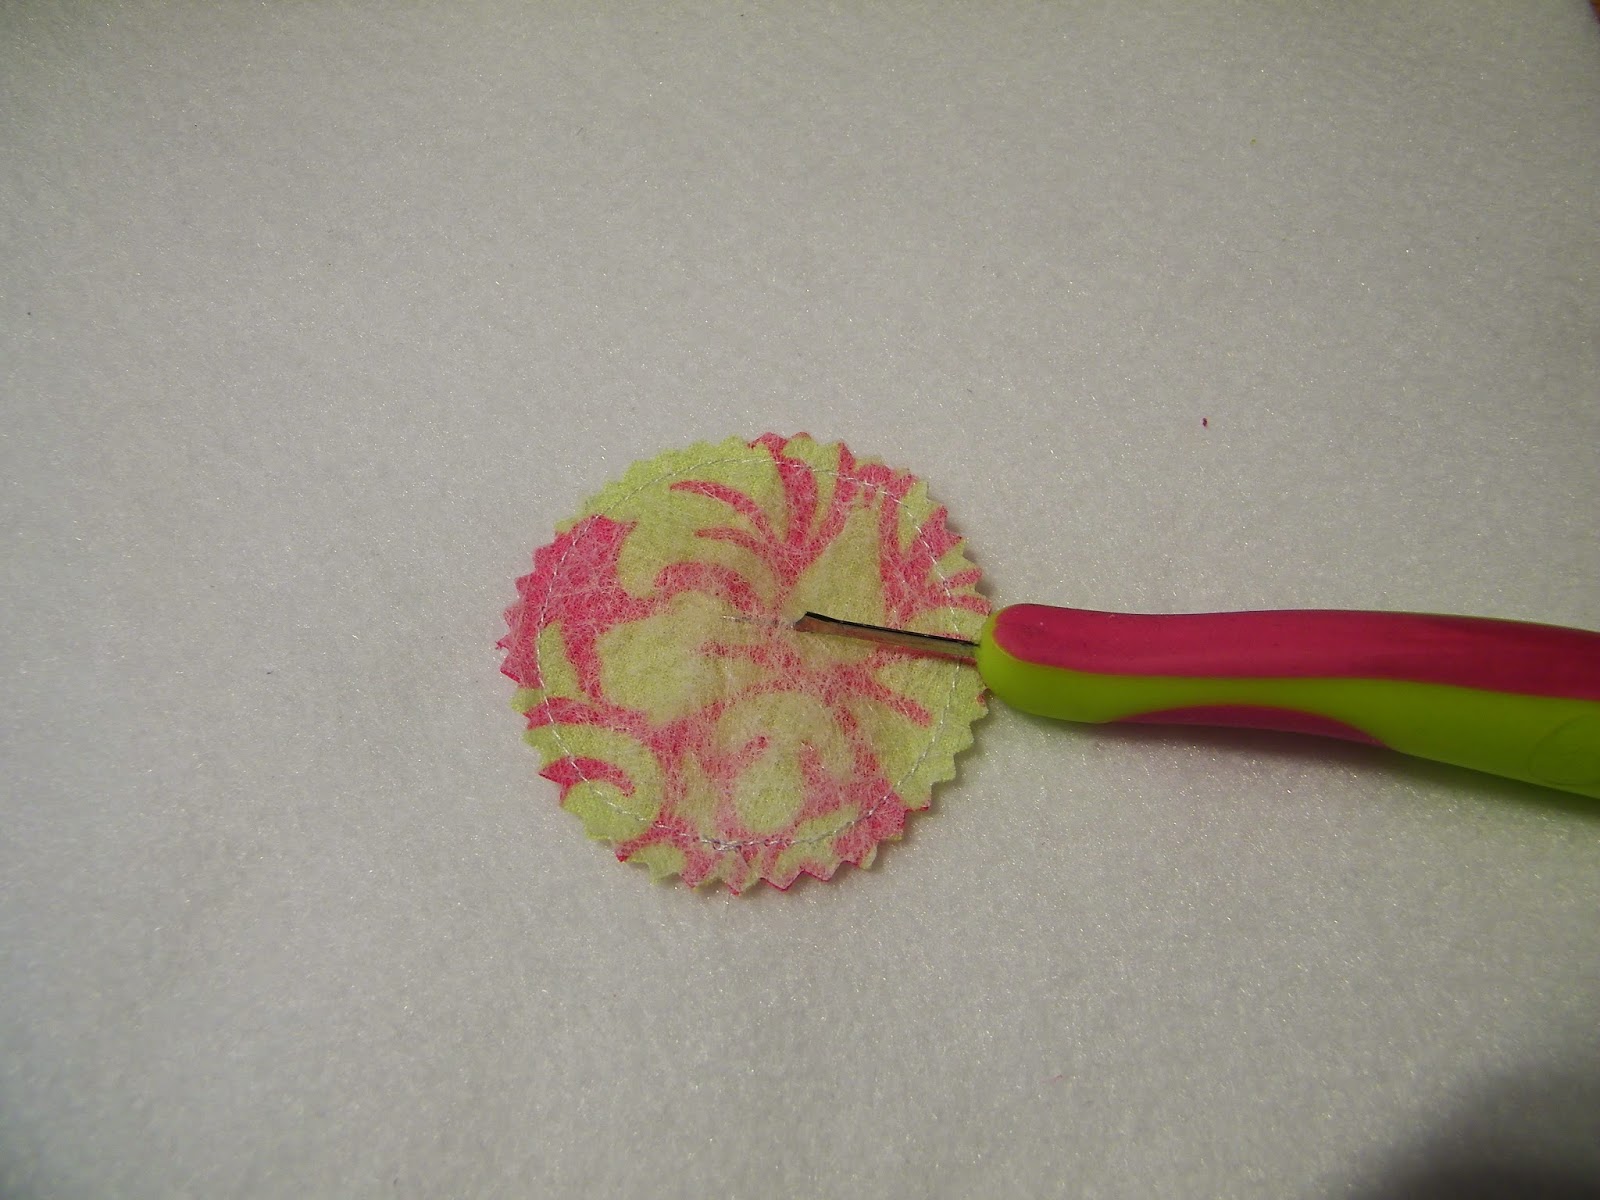

Take your seam ripper and make a short slit in the backing material only,Not the fabric.


Take your scissors and carefully snip an opening for turning your circle.  I like to snip an x large enough to turn the circle right side out,but be careful not to get too close to your stitch line.


Carefully turn your circle right side out.  I run my finger around the inside at the seam to help shape the circle.


Once the circle is turned give it a quick press.  Pretty :)


For my dish mat I will be using one large circle and eight small circles.  Here are six of my eight small circles all stitched to the dryer sheet.  Also all of my smaller circles are a single print.  Make your's however you like.


Pin the circles to the dish mat in a pattern you like.  You can use an applique or other fancy stitch on your machine to attach the circles,or just use a straight stitch.


Now all I need is a few dishes to wash so I can use this sweet new mat!  Hope you enjoy,and make yourself a new dish mat too.


Tuesday, October 15, 2013

Mid ~Month check in (ALYOF) And GiveAway #4

The 15th of October already?  Actually it seems more like the middle of December around here,weather wise anyway.  It snowed off and on all day!  (I am so Not ready for that yet)


This months goal is to finish up all of the circles for the Candy Beads quilt,started while at Fabric Fest last month.  Progress so far,all of the 5" & 7" circles done!  Just need to get the 10"circles finished.


Although that might seem like an easy goal to some,this has been a super busy month at work so far.(there have been very few days that have not included overtime)  Then there are also two Secret projects that are in the works,one due by the beginning of next month,one due on the 12th.

Oh,Right,the GiveAway ;)             (GIVEAWAY CLOSED)
                                                       ConGratuLations to Renea!!!


One lucky commenter (following is never a requirement of winning here) will win:

  • One slightly used (once at Fabric Fest) set of Circle Rulers
  • The pattern/instructions for Circle Beads Quilt (by Lori Holt)
  • One 3.5" stacker of Gracie Girl (21 squares)
What do you have to do for a chance to win???
Answer this Question...What handmade item would you buy/make to use as a stocking stuffer?  Could be for an adult or a child.  This giveaway will be open through next Wednesday Oct 23rd.  Good Luck!

Sunday, April 21, 2013

Playing with shapes

This past week was a particularly busy one around here (in the sewing room).  As you probably noticed the lack of posting...  Sorry to say it is probably going to be only a couple times a week for the next 6-8 weeks,while I continue to gear up for the farmers market this summer.  Hope you Sweet "Patch" readers understand and stick in there with me :)


Remember when I posted about these rulers ?  Well,the time finally came for me to sit down and have a play date with the circle rulers!  What a fun date it was too,as I thoroughly enjoyed myself!


This quilt started out as the squares with the baby wild animals(in my stash for around 5 years now) then I looked through my stash of Kona Solids to find some for the frames around the squares.  The background prints for the circles are from a fat quarter bundle I stole picked up while on my meet up with Melissa last summer (from her favorite LQS) it was $19.00 for 18 fat quarters!

I used a zig zag stitch to applique the circles to the background fabric,for the quilting I just FMQed squares around the squares and circles around the circles,fun,fun,fun!  This one finishes out at 40ish x 42ish.


The backside is a pretty striped fabric and a green print both also from my stash :)  For this quilt I decided to try a no binding edge,and am very happy with how it turned out.  Although this is the first time using this on a regular quilt,I have used it before when making quillows.  (haven't made one of those in a long time)

There is another quilt in progress,almost finished that I will be using this technique on also.  Hoping to show you that by mid week...


A sneak peak for you ;)


The last shapes I played with this past week!  This is also in progress,so you will just have to wait to see what it actually becomes ;)

As for my goals:  no progress yet on the Ooo Rah wallet,but it will be worked on this week.  Also,my row quilt is sewn into strips and the batting spray basted  to them,now to start the quilting...


This afternoon when going to our room to get a load of laundry this is what I found.  A sleeping kitty using my pj's for a pillow :)

Have a great week!