 |
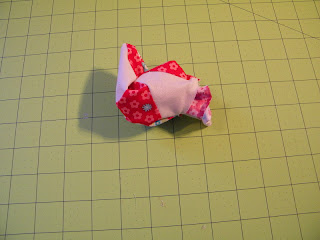
| This morning I got up early this morning to work on some sewing. The above photo is my Flying Geese block for the sew,happy.,quilt.QAL After making my block there were all these little triangle pieces left. What to do with them??? S~crappy Pincushion Tutorial |
 |
| First,take all those triangles and chain piece them together. |
 |
| Press the seams toward the darker fabric. |
 |
| Next,trim all those little ears that are sticking out at the corners off. |
 |
| Lay out your squares to make sure that the placement is correct. |
 |
| Take your two top pieces and sew them together. |
 |
| Press your seam to the outside. Repeat with the two bottom squares. |
 |
| This is what they will look like. Now sew the top and bottom together. |
 |
| Now we need to decide on the fabric for the back side of our pincushion. Since I am scrap busting my backing fabric came from the scrap bin. |
 |
| Place your square and backing fabric right sides together, and sew. Making sure to leave a 3-4 inch opening. This is for turning and stuffing purposes. |
 |
| Trim off the excess backing fabric. |
 |
| You will also want to trim off all the corners. (the tiny pieces in photo) |
 |
| Now turn your pincushion right side out. |
 |
| I use a little dowel with a pointed end to poke out the corners. These come in every bag of poly fiberfil that I buy. Some brands do not add these though. So use whatever you have on hand. |
 |
| Here it is all turned and pressed. |
 |
| Next you will need to use something to stuff this little guy with. I used poly fiberfil. The amount depends on how "stuffed" you like your pincushion. |
 |
| All stuffed. After stuffing you can either hand sew the opening closed, or use the machine. This one I hand sewed. The other ones I sewed on the machine. |
 |
| Now for the center button. You will need a package of buttons that you can cover with fabric,and another scrap of fabric. Alternately you can use a regular button. |
 |
| My finished/covered button. There are easy to follow instructions on the package. |
 |
| For this step you will need very strong thread,or if you don't have any,just double up your regular thread. Start at the back in the center and insert your needle. |
 |
| Wrap the thread around the button shank a couple times before running the needle back through the pincushion. |
 |
| Button sewn on and tied off at the back! |
 |
| So there you have it! A (4) S~crappy pincushion (s)!!! |


I am so happy you shared this. My quilt guild is having a big show in April and we can sell items there. This will be a quick and easy one to do. I have some other triangles I have been making into squares, so maybe I can do quite a few!
ReplyDeleteSuch a cute and creative use for those scraps!
ReplyDeleteAdorable! What a great idea :)
ReplyDeleteVery cute! Thanks for showing the process.
ReplyDeleteThanks for the tutorial! I love the colors in your block and the pin cushion is too cute. I going to cut out a few half square triangles and make one up.
ReplyDeleteVery Cute! Great way to use up those leftovers :)
ReplyDeleteYou are so inventive!! I love your block and your pincushions!
ReplyDeleteGreat tutorial, lovely pincushions and a use at last for all these little triangles I have been accumulating, thanks!
ReplyDeleteJust went and made one! Was looking for an easy pincushion tute!
ReplyDelete