 |
| So this is the quilt top that is going to go with the throw pillows that I made for my sis. Now all I have to do is find something to use for the backing fabric. I have been trying to only use fabric that I already had in my stash. But am going to have to break down and buy something for the back, because I don't have anything that will work. Hope that she likes it! Pretty sure she will, because she liked the pic I sent her of the pillows! You can find that post here.. http://celynnssunflowerpatch.blogspot.com/2011/02/throw-pillows.html |

Monday, February 28, 2011
Crazy quilt top
Sunday, February 27, 2011
my camera froze up!!!
 |
| So there I was taking pictures of these way cute metal flowers for my eBay store when my camera just froze! Yikes!!! Never had that happen before. Owned it for 3 years now. So went on line to see if someone else ever had the same problem. One of the suggestions I found said to take out the battery and then replace it. Which I did, and it worked! Yay! (no way I can afford to replace it) One of the suggestions that I didn't try was by a smarty who said "put it in the microwave on defrost mode" LOL! Anyway these were garden stakes/picks when they were purchased. But after getting them home they were promptly bent, and then JB weld was applied to the back. So that a hanger could be attached. |
 |
| These butterfly's were purchased without the hooks you see here. They have a magnet on the back so that they can be hung on any metal surface. I used some brazing rod to make the hooks for these. Then added a glass bead at the tip of the hook. |
 | |
| This is the last project for this weekend. Karen at Sew Many Ways has a tutorial on her blog for making these lil cuties! you can find it here http://sewmanyways.blogspot.com/2010/06/tool-time-tuesdaycanning-jars-not-just.html Hope everyone had a great crafting weekend! Linking up to Sew Many Ways, So Darn Crafty...Linking party #4 |
Sunday, February 20, 2011
Throw Pillows
 |
| These two pillows I made for my Sis! She is a Tea drinker, and although these are actually coffee cups, they could also be tea cups! The T blocks are included because her nickname is T. I hope that she loves them! Soon there will be a lap quilt that goes with these. |
 |
| Isn't this pillow too darn cute! The striped fabric is a small pillow case that is made to fit a throw pillow. There are several inches of overlap that are tucked in on the end that does not have the ties. Then the outer sleeve is placed over the striped pillow case. Then the ties are tied! So you can wash the case & sleeve, or switch them out for a different set when you want a change! |
Saturday, February 19, 2011
Electrical cord & utensil storage
 |
| Tired of all those electrical cords getting tangled up together? Well here is a simple storage solution. Take those toilet/paper towel cardboard tubes & add some fabric with modge podge! Problem solved. |
 |
| This is my new utensil storage container! |
 |
| We needed some way to keep all of the large kitchen utensils within easy reach. So instead of buying a utensil holder, I made my own! My husband uses the large tubs of Coffee Mate Creamer. So when this one was empty,and washed out it didn't go to the recycle bin. Instead, it went to my sewing/craft room for a make- over. After applying some Modge Podge & fabric, this is the end result! |
Friday, February 18, 2011
Alternative Veggie/Fruit bags
 |
| This is one of my new veggie/fruit bags. Yes it is kind of small. But just the right size for my husband and I. If the kids were still around we would definitely need bigger bags! |
 |
| This bag was supposed to be wider, but I ripped the mesh while sewing it. So ended up making it narrower. I would not recommend using this material, unless you are only going to put light weight items in it. Such as peppers, mushrooms, kale/lettuce ect. |
 |
| This bag was made from some curtains that I found the last time we went shopping at the Thrift stores! It was a great find, there were 4 panels 24x36 for $3.00! That will make quite a few bags! Yay, no more of those plastic bags! |
Tuesday, February 15, 2011
John Deere Tractor Fabric Gift Bag
 |
| So what do you think? Had this idea floating around my brain for a couple of weeks now. Wasn't sure exactly what fabric I wanted to use to try it out though. |
 |
| That is until this evening when I sat down at my sewing table and my eye landed on the yoyo's that I made last week. Then the whole thing just clicked! (Love it when that happens) You can't tell very well from the pictures, but the yoyo's are on the center of the tires! When I showed my hubby he thought it was cute! |
Sunday, February 13, 2011
Blue Jean Wine Bag Tutorial
 |
| Supply's needed 1 pair of Blue Jeans (just the legs will do) Thread in a coordinating or contrasting color Wine bottle (sparkling cider will do too) Scissors Embellishments of your choosing Sewing Machine (or you can hand sew) Lay your wine bottle on one of the legs of your jeans, use this as a guide for the measurement of where to cut the leg off. |
 |
| Cut the leg off, at your measurement. |
 |
| Now, turn the cut off part inside out |
 |
| Fold the cut end over 1/4 inch & then fold over again. You should have about 1/2 an inch fold, or the width of your presser foot. As in picture above. |
 |
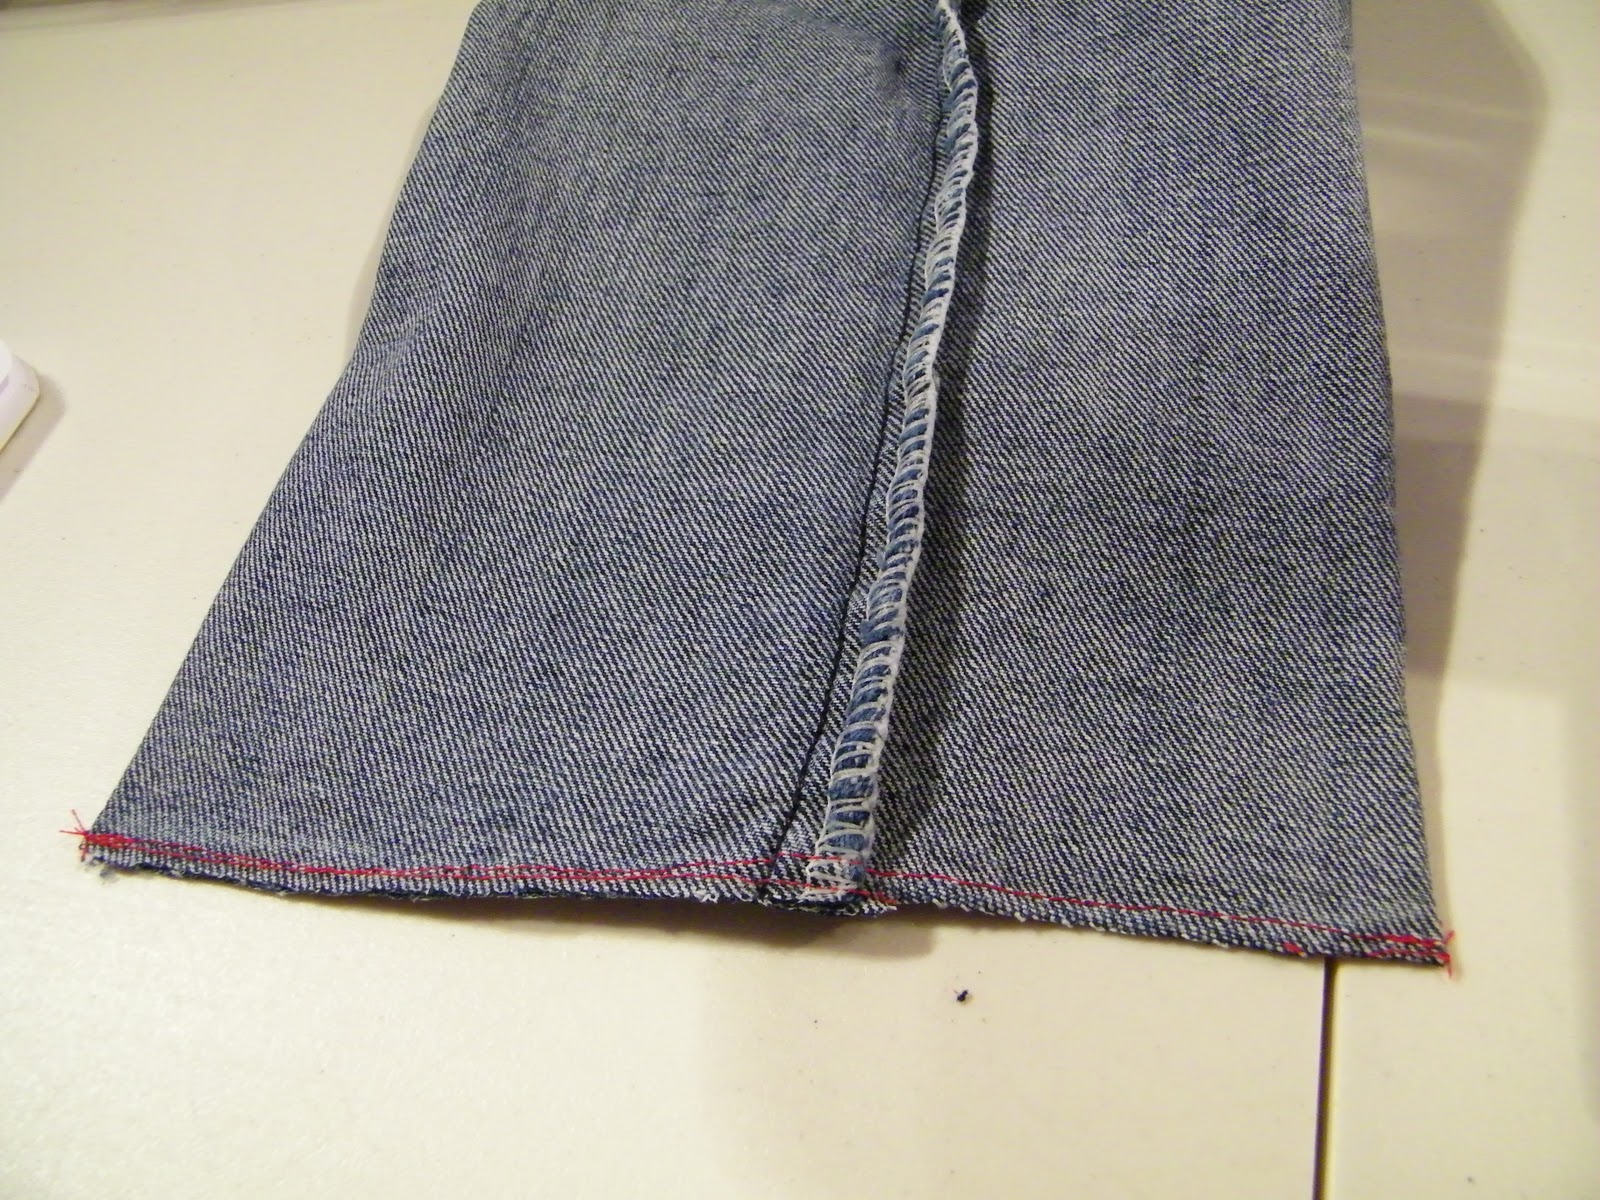
| Sew all the way around the leg, making sure to back stitch. I used red thread so you could see better, and also because I like to use contrasting thread. Maybe its the rebellious side of me coming out! |
 |
| Next, sew just above the cuff, or bottom hem/seam of the jeans. Again sewing all the way around the leg, and back stitching at the beginning and end. |
 |
| Now cut off the original hem, being careful not to cut your stitching. You could cut the hem off first if you want, and then sew the opening closed. |
 |
| Next, turn the leg right side out. Now comes the fun part! You can embellish to your hearts content! |
 |
| I added a scrap of Valentines fabric at the top of the leg. (since tomorrow is Valentines Day & my Wedding Anniversary too!) I sewed all the way around the top and the bottom, making a casing, I left a open spot in the back about an inch and a half wide. (sorry forgot to take a picture of that part) Using a safety pin attached to the trim, I pulled it through the casing. Then wrapped it around to the front of the bag and tied a bow, leaving the ends long to dangle the length of the bag. I also added a cute little patch, using a decorative stitch on my Machine. |
 |
| Here is the finished Wine Bottle bag! Whew! This is my first tute ever! Hope that it is clear and easy to understand. Linking to Sew Many Ways, Sew Darn Crafty Party Here ~ http://sewmanyways.blogspot.com/2011/02/sew-darn-craftyblog-party-2.html Also Linking to To Sew With Love ~ crafty Saturday Link-Up party no.8 Here ~ http://tosewwithlove.blogspot.com/2011/02/crafty-saturday-link-up-party-no-8.html |
Ice water!!
 |
| We took a trip to the city yesterday, this is some of the scenery on the way there! We have to go through a canyon (Big Horn Sheep Canyon ) to get there. The last time we saw A bunch of older rams with massive horns, of course I didn't have the camera last time! |
 |
| Had to wait for a few minutes to get this shot. Thought I was going to have to settle for a butt shot! Its like they were saying picture this! LOL! |
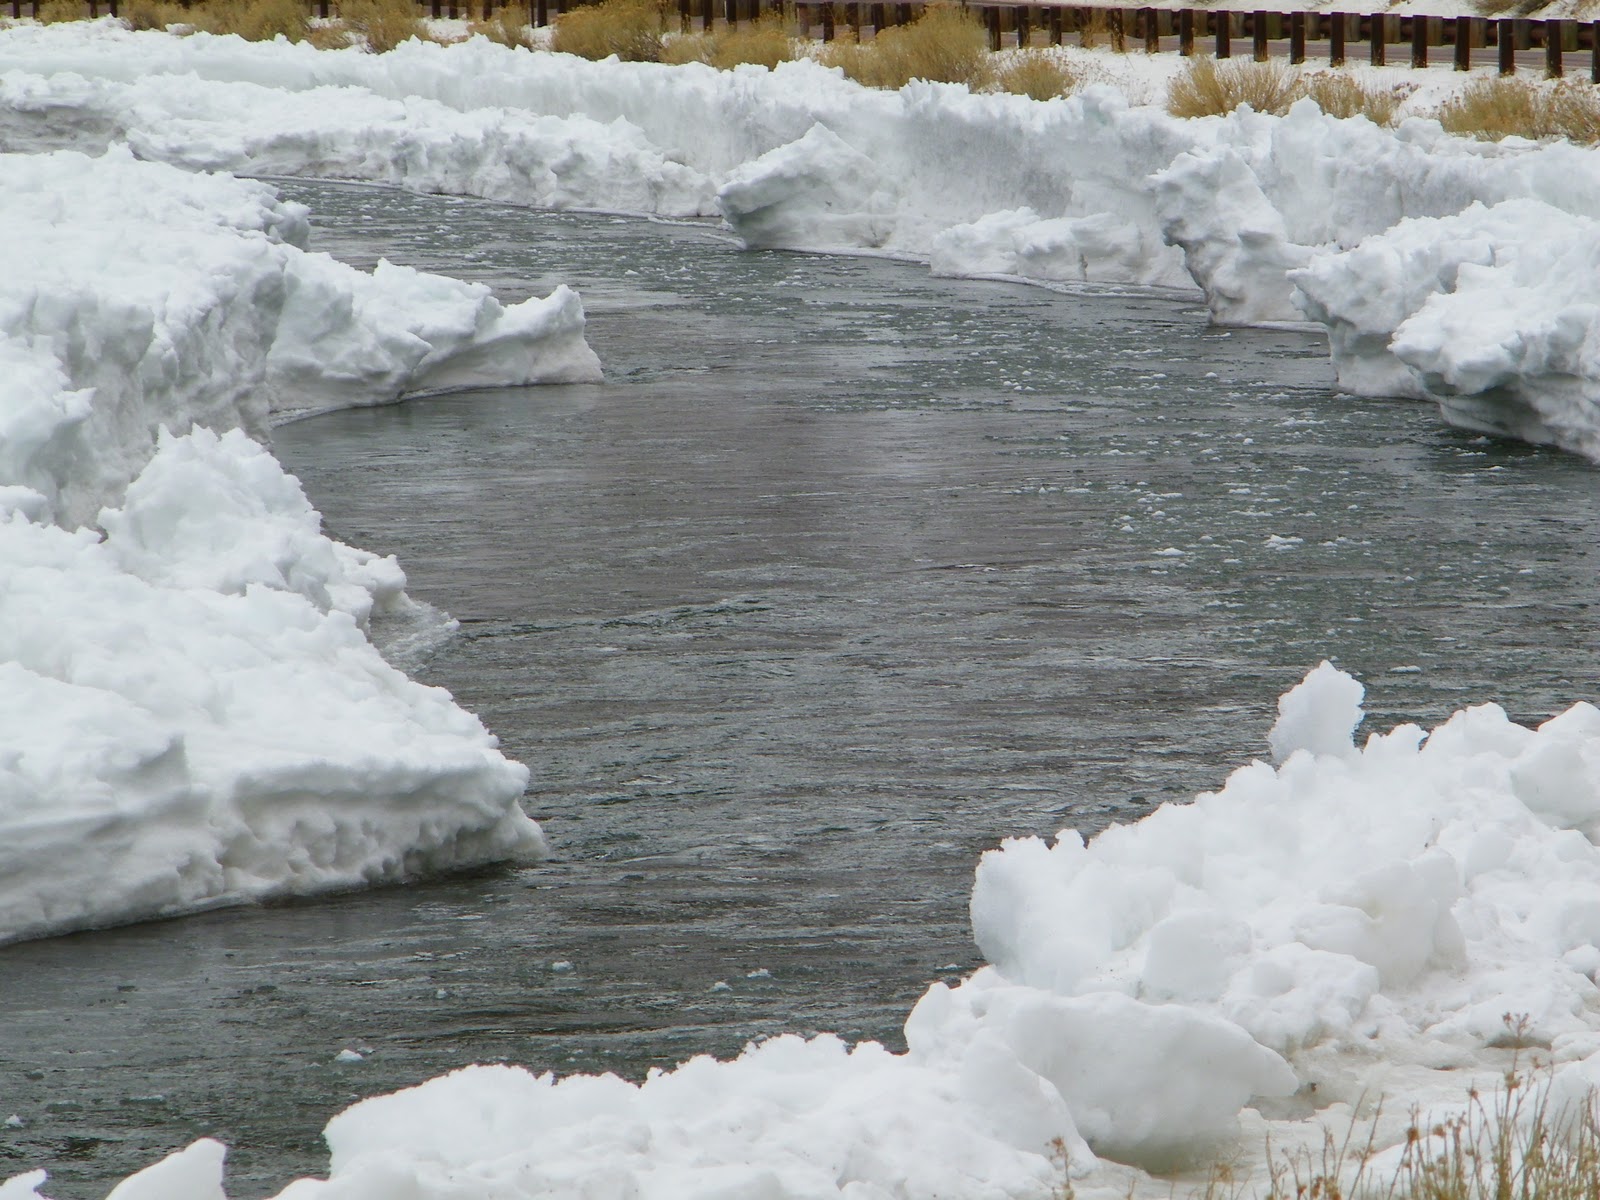 |
| This is the Arkansas River. There are some places where it is totally covered with snow and ice! |
 |
| Look how high the snow is above the water! Yikes! |
 |
| This water is cold in the summer, talk about ice water! |
 |
| Here I am standing on a platform that hangs over the river. This is looking up the river. |
 |
| And this is looking down river from the same spot. I love this drive! No matter what time of year you take it there is always something to see. We did see the pair of Bald Eagles before coming across the Big Horn Sheep, but one was to far away for a good shot and the other one was fishing! We would of had to stop in the middle of the road to get a picture. Not a good idea on a windy canyon road! |
Friday, February 11, 2011
Mug Rug

It turned out good except for the binding, which I always have issues with grrr!
So could Someone PLEASE tell me the secret to working with binding?
Wednesday, February 9, 2011
Reversable tote bags


Also made my first fabric yoyos!
Monday, February 7, 2011
Sensational handbag Giveaway!
Amy over at Curly Q Mosaics is having a giveaway to celebrate her 50th blog post! Congrats Amy! Keep em coming! :)
Her giveaway is the most adorable handbag you ever saw. (picture below) She will be announcing the winner on Valentines Day February 14th, she is also giving up to 6 chances to win this gorgeous bag!
So if you could use some BLING (and who can't?) visit her here ~ 50th-post-giveaway ~ for your chance to own this piece of art!
50th POST & GIVEAWAY!!!

Sunday, February 6, 2011
Pizza dough recipe
Basic Pizza Dough
1 cup warm water (about 110 degrees)
1 package (.25 ounce) dry active yeast
2 3/4 cups all purpose flour (I used half whole wheat pastry & half all purpose)
1 teaspoon sugar
1 teaspoon salt
2 tablespoons olive oil
In mixer or large bowl, mix flour and salt. Create a small well in the center and add yeast, sugar, oil, and water.
Mix or stir until dough comes together and forms a ball.
Turn out onto a floured surface and knead for 5 minutes, adding as much of the remaining 1/4 cup flour as needed. Form a disc or ball and place in a bowl that has been lightly coated with oil. Turn disc/ball to coat with oil, cover bowl with towel or plastic wrap. Allow to raise (in a warm place) until doubled in size. 1-2 hours.
Remove dough from bowl and punch down (punch in center with your fist) Roll out, or hand toss, to desired size.
Top with your favorite sauce and toppings.
Bake at 425 for 18 minutes.
enjoy!


Wednesday, February 2, 2011
Crochet Hook & Knitting Needle tubes


Once dinner was over and the kitchen tidied up it was off to my sewing/craft room. First I pulled out the craft bond adhesive spray and then the Modge Podge and a paint brush. The fabric came from my scrap bag. The first set of tubes were covered with fabric using the craft bond adhesive spray. The second set were covered using Modge Podge.
Then out came the hot glue gun and some silk flower blossoms. I then glued one flower to the cap of each tube! I think that they turned out fabulous!
Thank you Karen for the Awesome Tute & inspiration!
You can find Karen's Tutorial here tool-time-tuesdayknitting-needle-holder
Subscribe to:
Posts (Atom)