| Here are some of the goodies that I baked up for the bake sale. 8 dozen cookies! Also baked but not pictured were 2 loves of pumpkin bread & 2 cakes. |
Sunday, September 4, 2011
Baking update & recipe for Jolene :)
Thursday, September 1, 2011
Baking up a Storm tonight :)
| And here is my Modern V quilt top All finished,now I need to find time to quilt it! Want to enter my giveaway? Go here Will try to post some photos of all my baked goodies tomorrow evening :) |
Monday, August 29, 2011
And the Winner is... (Drum Roll, Please) & another Giveaway!!
| With out further ado,here are the some of the items you could win this week :) A hand full of sewing accessories. |
| A few patterns. |
Sunday, August 28, 2011
Peach Salsa Twister ~Tutorial~
| For this project you will need... 20 charm (5x5)squares 1/3 yard fabric for inner border 2/3 yard for outer border/binding 1 yard backing fabric 1 yard batting Lil Twister template |
| Lay out your squares in a 6x4 pattern. |
| Sew your squares together in rows. You can either sew them from one side to the other,or from top to bottom. |
| Here are all my rows sewn together. |
| Take each row to the ironing board and press your seams open. |
| After pressing open all of your seams sew your rows to each other,as before either side to side or top to bottom. |
| Next you will need to press all of your seams open again. |
| Here all of the strips/rows are sewn together to make 1 large block/mini quilt. |
| Next you will need to cut your inner border fabric. Cut 3 inch strips the width of your fabric. |
| Sew the strips to your large block/mini quilt of fabric on all sides. |
| Press open your seams. |
| At this point your large block/mini quilt should look like this. |
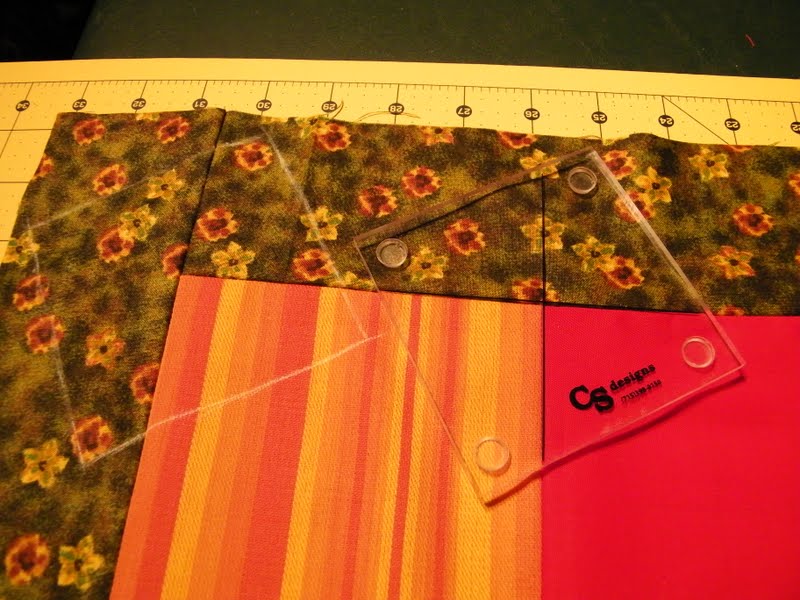
| Now take your Lil Twister template and line up the black lines on it with the seams on your mini quilt. As shown above. |
| Here is another picture of the traced templates. |
| The first row of squares has been cut out and laid out in the same way they were cut. |
| In this photo my first row has been sewed together. You will repeat the steps from above. Sewing your squares together in rows and pressing your seams open as you go. |
| This is what I had left,as I took the small wedge shaped fabric scraps and threw them in my scrap bin. |
| All the squares have now been sewed back together here. Hopefully minus my mistake on your version :) |
| Here is a photo of the back side with all the seams nicely pressed open. |
| Press the seams open. |
| There you go! You now have a Lil Twister Mini Quilt top! |
| Here is a picture taken outside on my clothes line. You can now make a quilt sandwich with your quilt top, batting and backing. quilt as desired and then bind together. |
Friday, August 26, 2011
The Grim Ripper
| These are the other 12 that I didn't have to rip apart. Instructions said make 24,they should have said make 12. |
| Block #1 on left Block #2 on right I wanted to post the 4 that make up the whole block,however since I had a ripping party this evening that didn't happen. Sew maybe tomorrow :) If you have not entered my giveaway be sure to check it out soon ;) Have The Day Of Your Choice ;) |
Subscribe to:
Posts (Atom)