Showing posts with label Remember September. Show all posts

Thursday, October 4, 2012

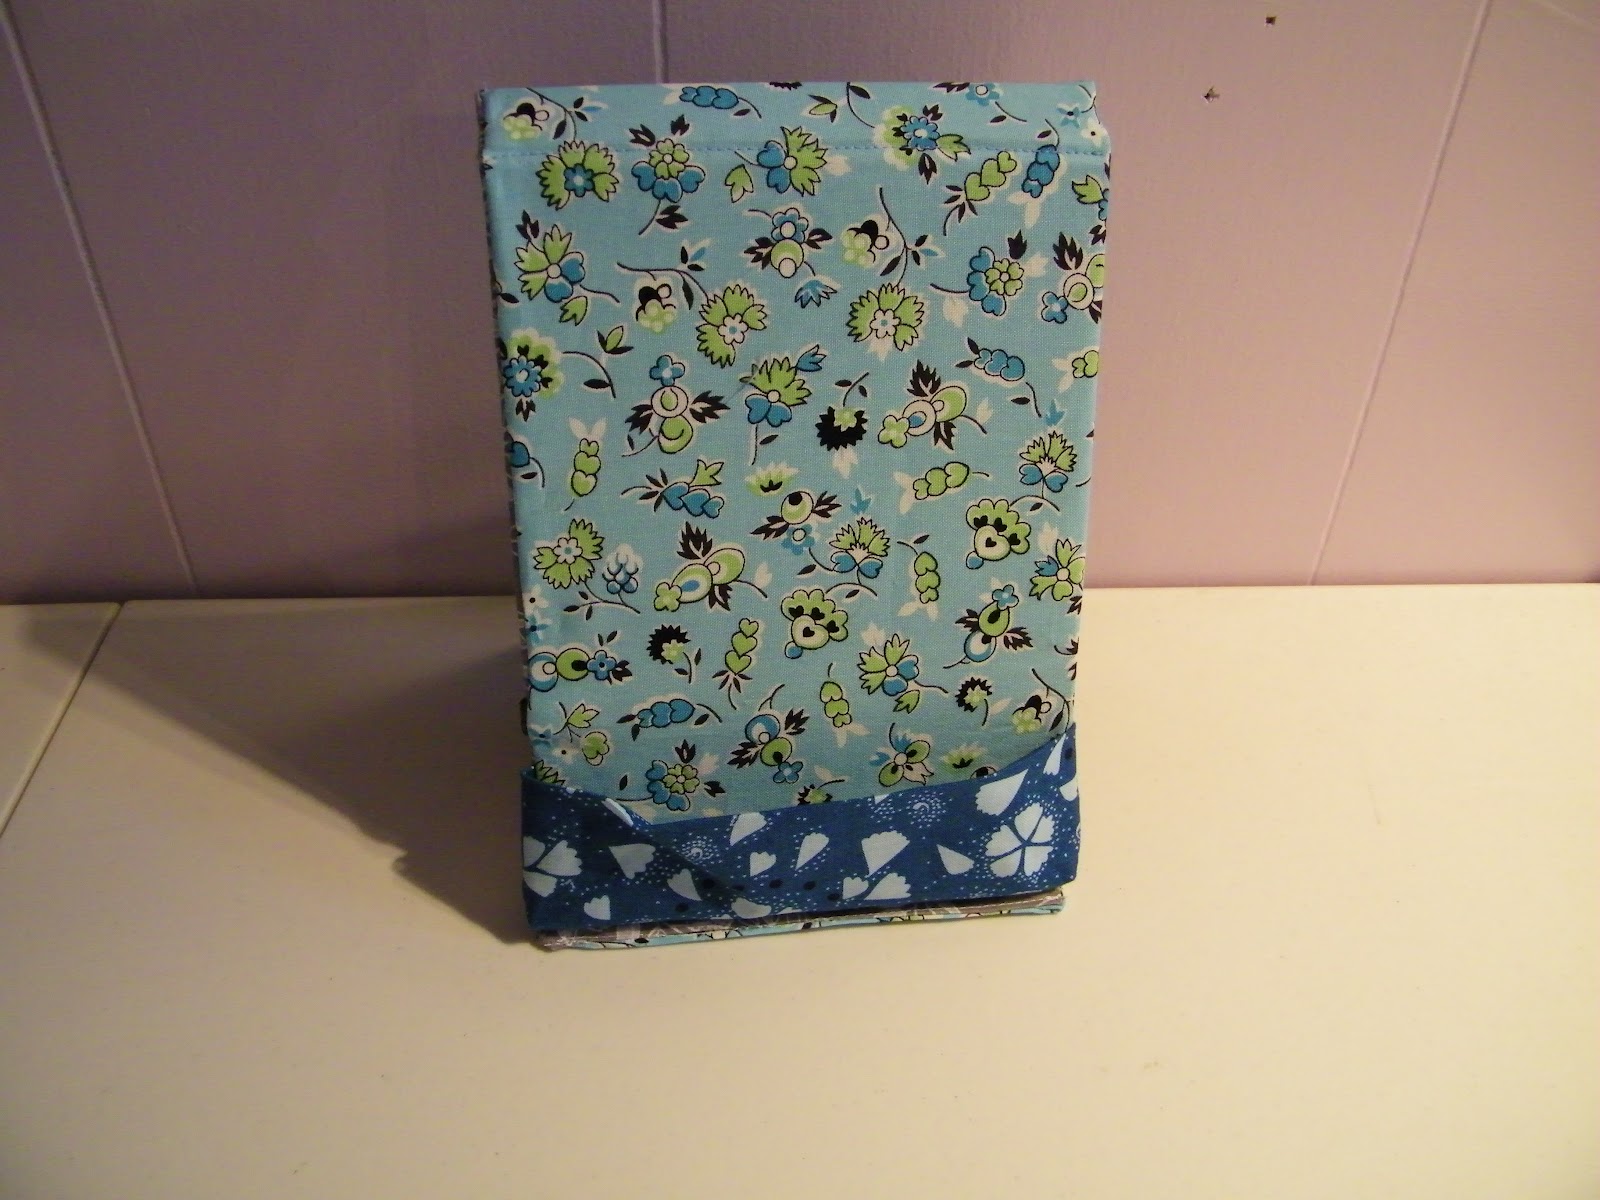
Finished e reader cases & a mini apple pie!

This evening it was way to windy to go walking,so it was off to the sewing room instead!


The end result is,is that the last two e reader cases are now done and ready to ship out to Melissa !


The mini pie :)  So there was this pie crust sitting in my fridge (I know,that is cheating,but sometimes I am just to tired to make everything from scratch) that needed to be used.  There are also apples sitting in the fruit basket looking all sweet and delicious ;)  Then there was the leftover streusel topping from a pie awhile back....

So I took the pie crust,a couple apples,the streusel topping,Carmel,my muffin tin,and a wide mouth jar ring,and this is what we ended up with!

Core and peel the apples,then chop up in smalish pieces.  Put them in a bowl with a couple tablespoons each,brown sugar,and white sugar,mix to coat thoroughly,next add about half of the carmel,set aside.  Roll out the pie crust,using the wide mouth jar ring cut out circles,carefully put the circles of crust into the muffin tin.  Spoon the apple mixture into the mini pie shells you just made in the muffin tin.  Top with the streusel topping,place in a 350 degree oven for 25-35 minutes.

Remove from oven and carefully take the mini pies out of the muffin tin and enjoy!  Be careful not to burn yourself by eating them before they cool off a bit!!

Sunday, September 30, 2012

Remember September e reader case/covers

 This month over at Hopeful Threads the project was to make pillowcases and e reader case/covers for deployed troops.  As you know if you are a follower of my blog,Gil is a Marine,so this was a cause near and dear to my heart.  So of course I jumped in and joined the project,in an earlier post I showed 2 of the 6 pillowcases I made.

On to the e reader cases/covers  (all of these are for Kindle readers)


The first one for a Kindle 1 has a pocket to hold the kindle.


Number 2 is also for a Kindle 1 reader,all of the cases/covers that I made are a hands free design,not my own mind you,although I wish it were,because it is a genius idea!


Since I do not own an e reader,I had to use a pamphlet to show how this one will hold the e reader.


A side view of the above reader case,which is for a Kindle Fire.


Front view of the second Kindle Fire case,with the pre-amble printed on the fabric.


The back,or outside of the above case.  I thought that it would be fitting to use fabric with flames for the 2 Kindle Fire cases :)


Next up is the final one I was able to get finished,because I ran out of the elastic headbands that are used on each corner of the front to hold the e reader to the case.  There is also a strip on the back to hold the case closed when not in use.


Angle view of the above reader case,which is for a 3G Kindle reader.  What makes these reader cases stand up for hands free use is,chipboard inserted inside of the fabric!  After looking at a Lot of different designs I happened across this Tutorial pure genius!


(All five cases made so far,this is a view of the back or outside)
Although I did have to alter some of the measurements by an eighth of an inch to get the chipboard to fit properly (I even used my 1/4" foot too).  My plan was to make 2 of each case,so after I buy another package of headbands I will make up the last three.  Then they will all be on the way to My Friend Melissa and after that on to the troops :)

Thursday, September 20, 2012

Remember September Pillowcase Tutorial

Today after work I finally had a chance to spend some time in my cave,as Mr. P. calls it,otherwise known as my sewing room :)  Have you heard about the Remember September Project if not go ahead and check it out,and then head back here for a pillowcase tutorial.


For the first pillowcase I used some fabric purchased from Hancocks a couple years ago.  It is called Defenders of Freedom.  The pillow panels did not run the right way for me to make a pillowcase,so I ended up cutting them apart and piecing them back together.  This is one side/pillow panel


This is the other side.  Some of this fabric was used it Gil's quilt,the rest has just been sitting in my stash waiting for the right project to come along,and here it is!

Pillowcase Tutorial:

For this project you will need the following supply's

  • basic sewing supply's,sewing machine,scissors,thread,ruler,etc.
  • three different fabrics coordinating or contrasting 
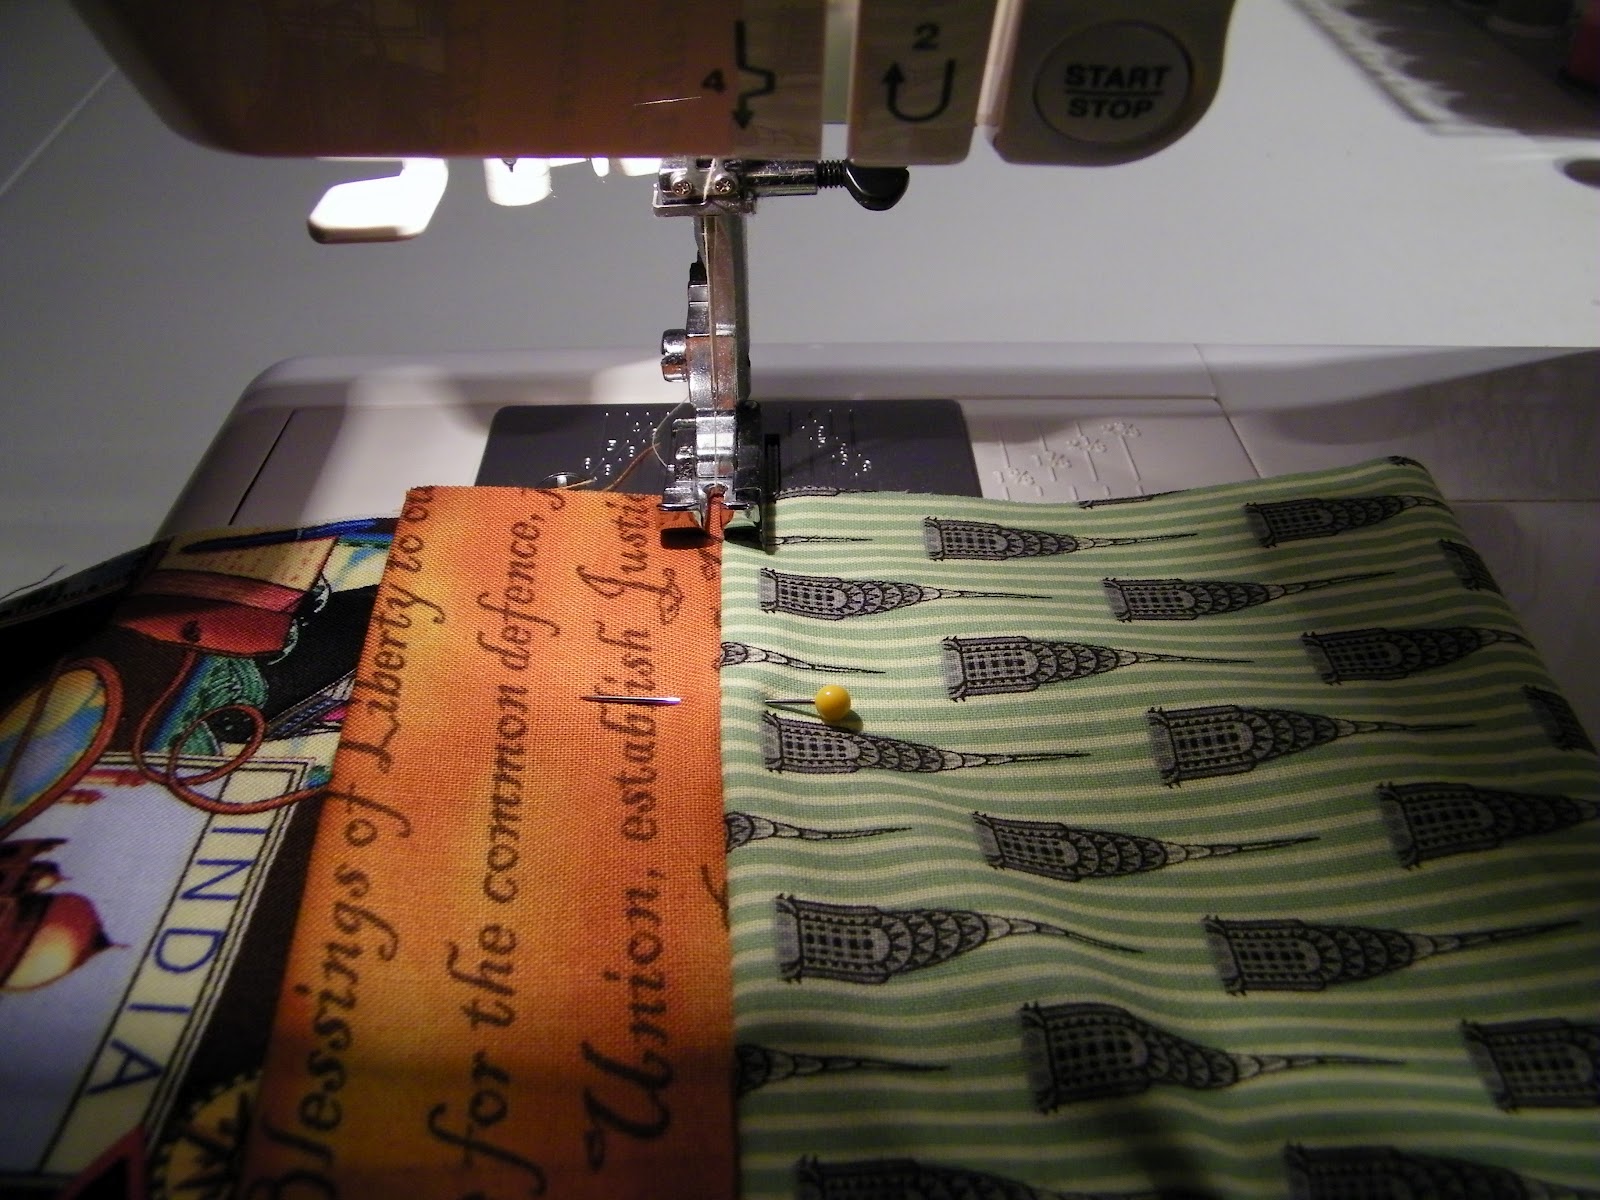
My three fabrics are pictured above,the brown print in the front is for the body of the pillowcase,the green is for the cuff,and the orange is for the insert strip that goes between the body and the cuff.


  • fabric for body 27 x 44 inches 
  • fabric for the cuff 9 x 44 inches
  • fabric for insert strip 4 x 44 inches (you can use a different size width here depending on if you want a wider or narrower insert strip) 

Take your insert strip and fold wrong sides together lengthwise,as pictured above.


Press along the entire 44 inch length.


Lay out the fabric for the body of the pillowcase right side up,take your insert strip and lay it on top of the body fabric raw edges together.


Next take your cuff fabric and lay it right side down on top of the other two fabrics,like in the photo above.  Mine is offset just to show you,make sure that you line them up to sew them together.


Here all my fabrics are lined up ready to sew.  Sew all three layers together with a 1/4 inch seam,the entire 44 inch length.


Here is what it should look like after you have sewn the three pieces together.  Press the seams toward the cuff.


Like in the above photo.


Along the top/raw edge of the cuff fold over 1/2 inch,

pressing as you go all the way along the edge.


Fold your cuff piece wrong sides together,to the inside,covering the raw edges of seam you just sewed.


Pin to keep your fabric in place,removing the pins as you come to them.


Ready to top stitch.


Top stitch a tiny 1/8 inch from the cuff side,as pictured above.  Being careful to catch all three layers of fabric.


This is what will happen if you do not catch all three layers!  I had to re-sew this spot!


Press your cuff to get a nice crisp flat top edge.


Fold your pillowcase wrong sides together and again sew a tiny 1/8 inch seam all along the raw side and end edges.


I know you are thinking What?  Trust me ;)  We are sewing what is known as a French Seam.


Here is my tiny 1/8 inch seam.  You can just see the beige thread on the darker brown.


Turn your pillowcase wrong side out,making sure to push out both corners to make nice points.  Just like if it was right side out.


Now sew the same two sides with a 1/4 inch seam.


Turn your pillowcase right side out again,and push out the corners,and press the edges.


There you have it,a beautiful handmade pillowcase!  Pat yourself on the back for a job well done :)


I am hoping to make at least two more to send and then a few e reader cases too.
Hope you make yourself and Melissa some beautiful pillowcases,enjoy!